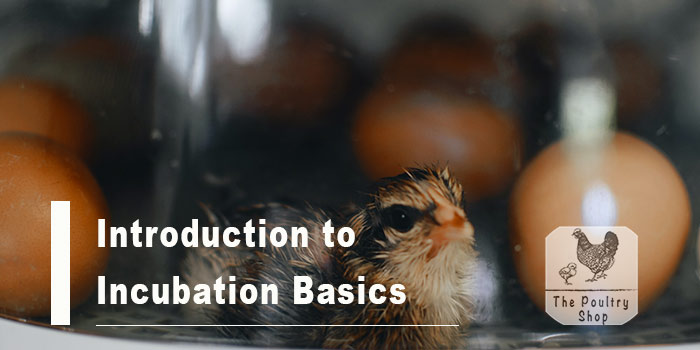
To help you appreciate the background regarding incubation and hatching chicks, here is a quick overview of what incubation for chicken eggs involves:
1. Fertilised eggs
The process of hatching chicks requires good quality fertilised eggs. These are eggs that are laid when a hen and a cock/rooster mate. Only fertile eggs will hatch into chicks. To achieve high hatch rates, only use fertile eggs that are less than 7 days old from the day they were laid.
2. Incubator
An incubator is a machine that creates the perfect artificial conditions for a fertilised egg to hatch into a chick. An egg incubator is designed to regulate temperature, humidity, turning of eggs at regular intervals, fresh air flow, hygienic environment as well as providing a secure place for the eggs. Incubators recreate the role that a broody hen plays in nature.
3. Incubation period
Chicken eggs take 21 days to hatch. From the day you place the fertile eggs in an incubator, expect the chicks to come out on Day 21 or 22. For instance, if you place eggs in the incubator on the 5th day of the month, chicks should hatch starting on the 26th day and you can leave them in the incubator for another 24hours until the 27th day. By then all chicks should have hatched out of the shells and feathers properly dried.
4. Egg setting
On Day 1, eggs are placed in the setter where they will remain until the morning of Day 18. Egg setter is part of the incubator that has a mechanism where eggs can be turned automatically after every hour. The egg turner tilts the eggs from side to side at regular intervals. For manual setters, egg turning has to be done at least 8 times a day. The purpose of turning eggs is to ensure the egg contents (embryo) inside the egg does not stick to the inside wall of the shell as this results to the chick failing to hatch.
5. Candling
Its not always possible to tell if an egg is fertilised or not just by looking at it. Fertilised and non-fertilised eggs all look the same from the outside in terms of egg shape and colour. The process of candling is the only way you can tell if eggs are fertile or not and this is only possible after 7days.
On day 7 and again on day 12, look at embryo development by holding eggs over a bright light. You can use a candling torch or your phone’s torch it works fine. Candling is best done in a dark room or at night. With the pointed part facing down, you place the egg on top of the light source and cover the light source completely such that the light will shine through the egg. Healthy embryos will have veins resembling a spider’s web.
On day 12, healthy embryos should show up dark and cover two thirds of the egg. Bright glowing eggs with no visible veins should be removed from the incubator as they are not fertile. You can even cook and eat those eggs.
To avoid contamination, always sanitise your hands before touching the eggs.
Candling also helps to identify eggs with cracks, thin spots, and double yolks and such eggs should be removed from the incubator. For more information on egg candling, check this post I covered on what is egg candling and its benefits.
6. Egg transfer to hatcher
On the morning of Day 18, eggs must be transferred from the setter to the hatcher (plastic crates) which are found in the incubator. The hatcher is the part of the incubator where the eggs lie still for the last 3 days of the incubation phase.
Generally, the humidity and airflow is slightly higher in the hatcher due to the fact that eggs require a higher humidity towards the hatching phase. The hatcher creates a stable environment for the eggs to hatch in. No turning of the eggs happens during this phase. The chick inside the eggs aligns itself so that it can peck its way out of the shell.
For differences between a setter and hatcher, you can check this post on the 5 reasons you should start an egg hatchery.
The hatching period is the most sensitive and critical stage. Avoid opening the incubator unnecessarily and power supply should not be interrupted for whatever reason. Always ensure you have backup supply such as a solar system or generator.
On Day 21 or 22, the chicks will start pipping and coming out of the shells. Chicks can be left inside the incubator for up to 24hours after they have hatched. This will help them to dry out and develop some downy feathers. When most of the chicks have hatched you may start removing them.
7. Hatch rates
Not all eggs will hatch. There are several reasons to this and will be covered in later posts. Its always safer to work with a hatch rate of 80% assuming all eggs are fertile and all incubation practices have been followed. However, with experience and use of digital incubators, hatch rates above 95% can still be attained. To calculate hatch rate, check this post here.
8. Ideal incubation temperatures
Ideal incubation temperature is 37.5 degrees celsius and most incubators are preset to regulate the temperature to 37.5 degrees celsius. The temperature reading usually lights at the front of the incubator.
Slight temperature variations between 36 and 38 degrees celsius is fine and normal. Anything outside this range should become a cause for concern and you should adjust your incubator to maintain temperature range.
9. Ideal humidity requirements
Ideal incubation humidity is 60% (30 degrees celsius on wet thermometer) and fluctuations between 50% and 65% are normal. On the wet thermometer (found inside the incubator), this translates to 28 to 31 degrees celsius. Most incubators are preset to regulate humidity in the setter and hatcher.
10. Cleaning incubators
After every hatch, ensure the incubators are thoroughly vacuumed of any fluff, cleaned and disinfected. Sanitation is an important part of incubating. Remove and dispose of the shells and other remains carefully to avoid environmental contamination. Clean the inside of the incubator with Virukill and water, and let it dry completely before putting it away.
Conclusion
Hatching chicks requires the use of good quality incubators and fertilised eggs. Its therefore important to buy your equipment and fertilised eggs from reliable suppliers to avoid losses.
If a breeder does not keep records or you have not seen the parent stocks, be mindful of the risks involved. You may get infertile eggs or wrong breeds. The best alternative would be to keep your own hens and cocks and have control over the quality of fertilised eggs.
The next section will cover breeding stock selection and management in case you may want to raise your own flock to supply you with fertilised eggs.
Disclaimer: Information provided in this article is a general guide as incubator models and processes may differ. Always follow your manufacturer’s recommendations.
Did you find this article helpful? Leave a comment below or subscribe to my free Email Newsletter and also like The Poultry Shop Facebook page. Thanks!


Thanks for your insightful content. I learn a lot in reading your posts. Thanks Allen.
wher can i get an automatic egg incubator wc uses both solar and ZESA ,ALSO MAY U KINDLY RECOMMENT WC INCUBATOR IS BETTER WOOD OR STEEL
Kindly check Business Directory and Classifieds on this blog. A number of manufacturers of incubators are listed there. Most incubators are made of a combination of durable wood and steel, thanks.